For successful call center operation, it’s crucial to properly organize the import of numbers. In this article, we will explain how to import contacts into CRM and the Oki-Toki dialer step by step, starting from setting up the necessary fields to successful database upload and process automation.
Step 1: Import preparation
To import contacts into CRM, go to the Project Resources section, then select Mass operations, click Create and choose Import.
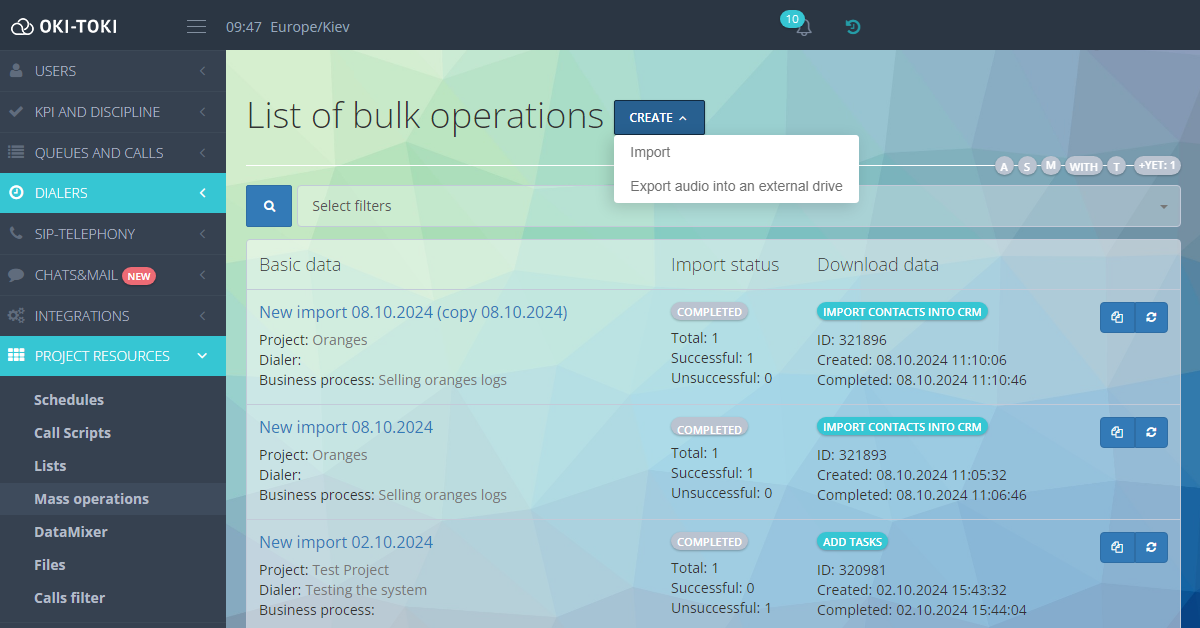
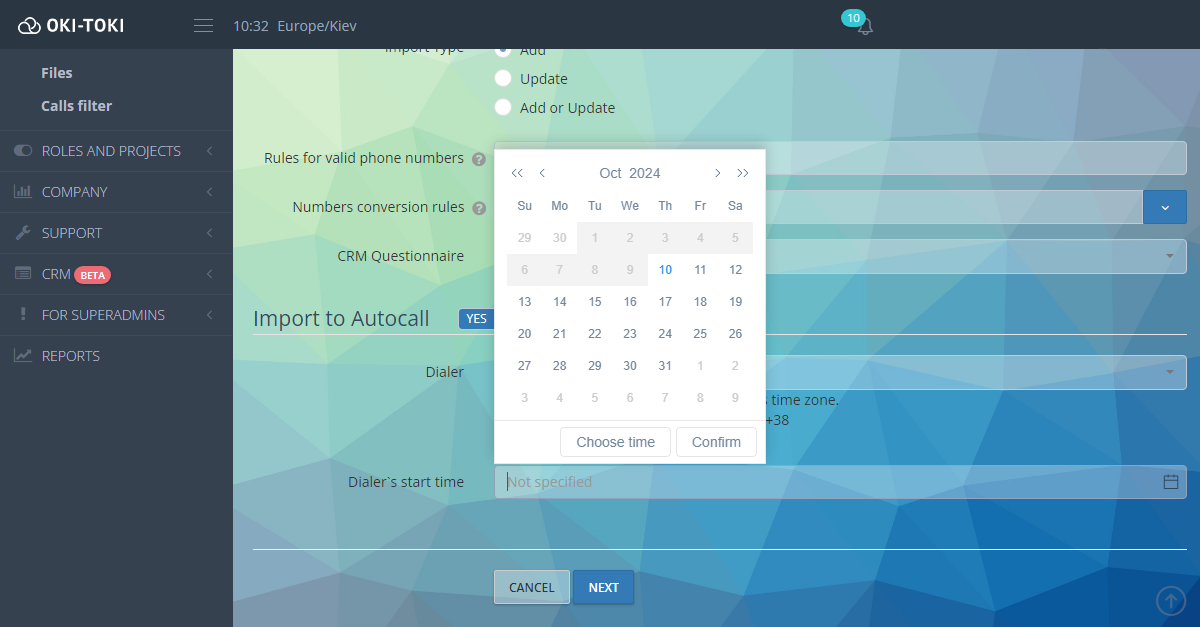
A step-by-step wizard for uploading a contact database into CRM will open. On the first step, you need to name the import, select the project, and determine where the data will be uploaded: only to CRM, only to the dialer, or to both.
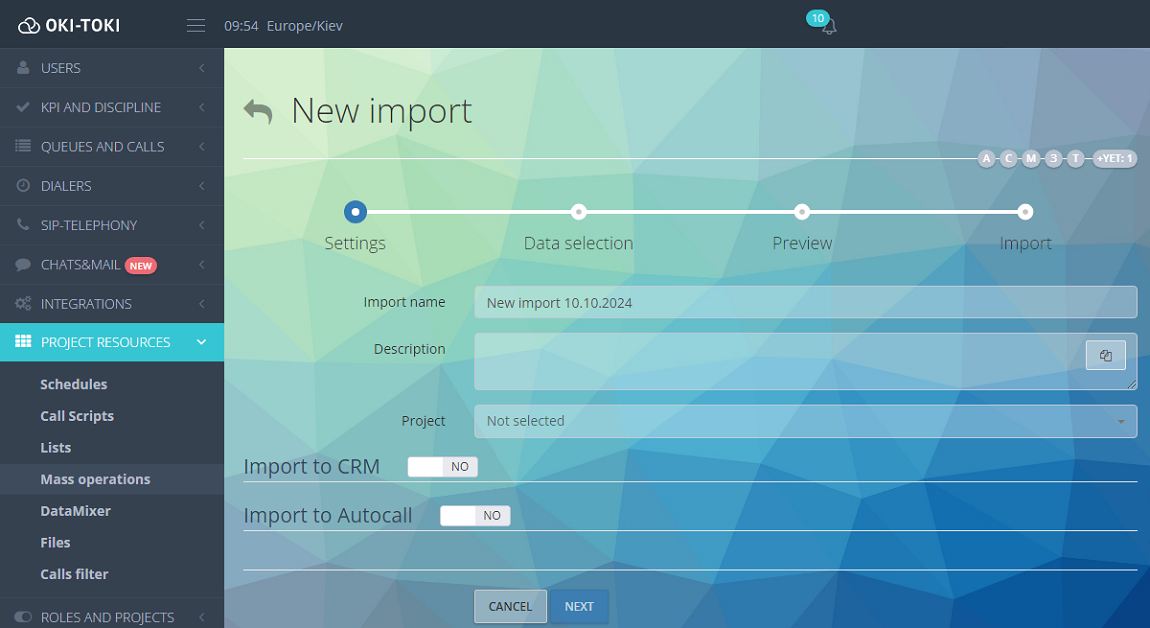
Types of import into CRM:
- Addition — a frequently chosen option, where the system uploads contacts that have successfully passed duplicates check and number correctness.
- Update — used for updating fields of existing contacts. It’s important that there are no duplicates in CRM.
- Addition + Update — a hybrid option, where new contacts are added, and existing ones are updated.
After choosing the type of import, configure validation and number transformation rules.
- Rules for valid phone numbers — Examples of allowable phone numbers: [12] — contain 12 digits; 044 — start with 044; 044[7] — start with 044 and contain another 7 digits. Separate with a comma.
- Number transformation rules — for example, the formula [11]/-7+8 replaces the prefix “7” with “8” for all 11-digit numbers where the first digit is “7”. Formulas are flexible and can be tailored to specific requirements.
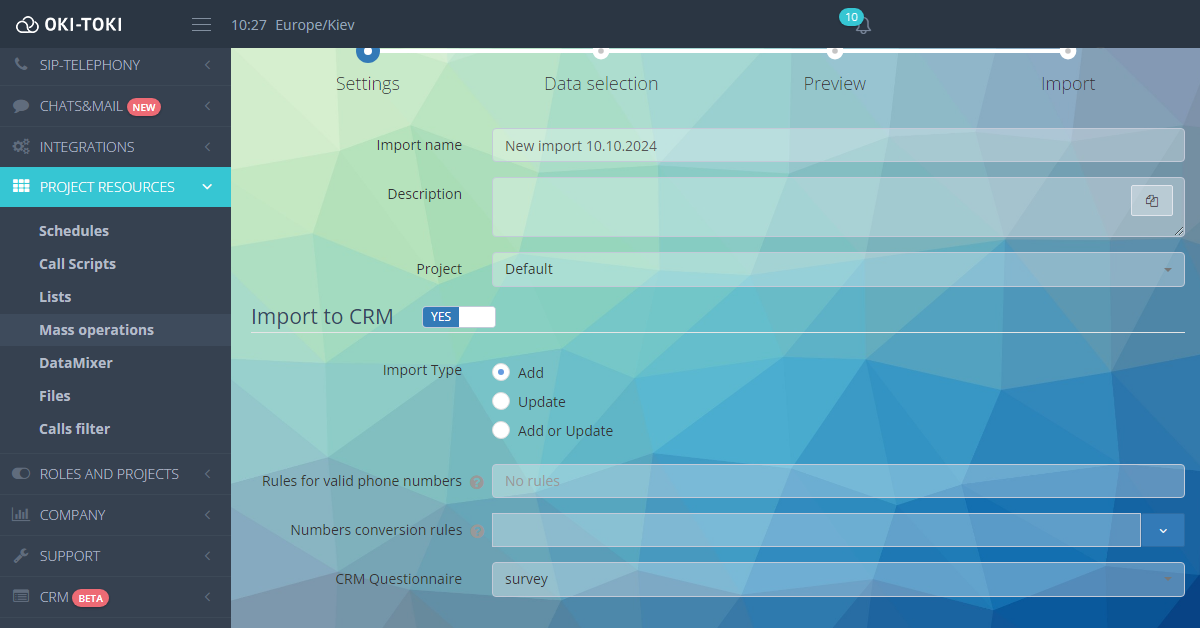
In the field CRM Form select the form to which the uploaded leads will be linked. If you want the added contacts to be automatically dialed, choose Import to Dialer and specify the required dialer.
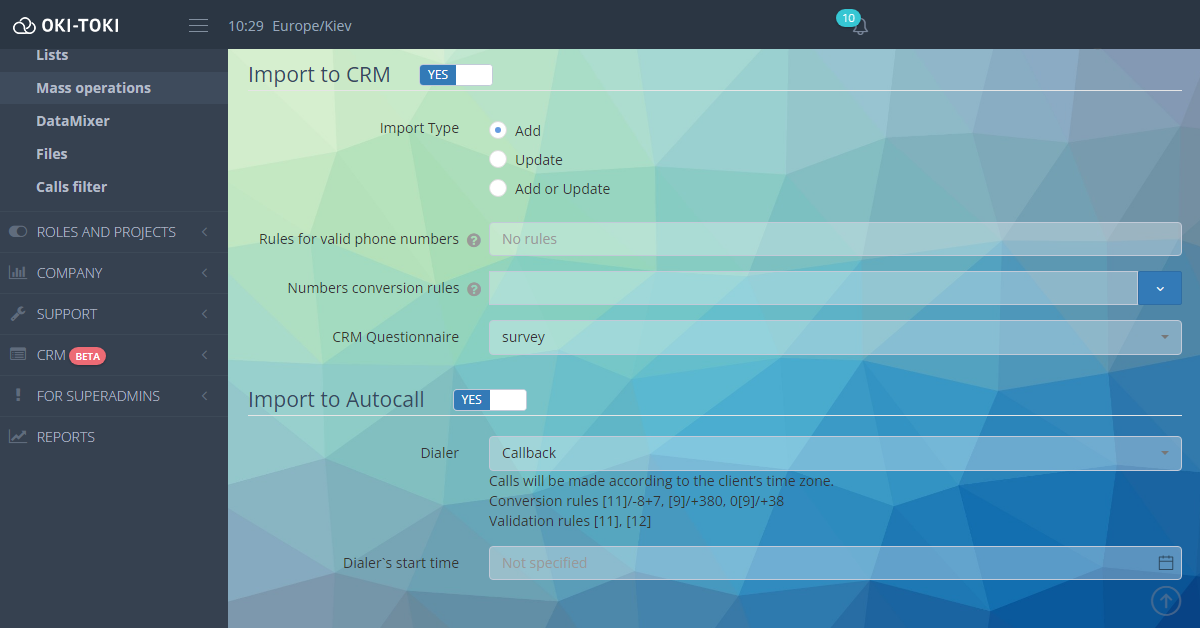
You can also set the dialing start time for new leads.
Step 2: Data selection
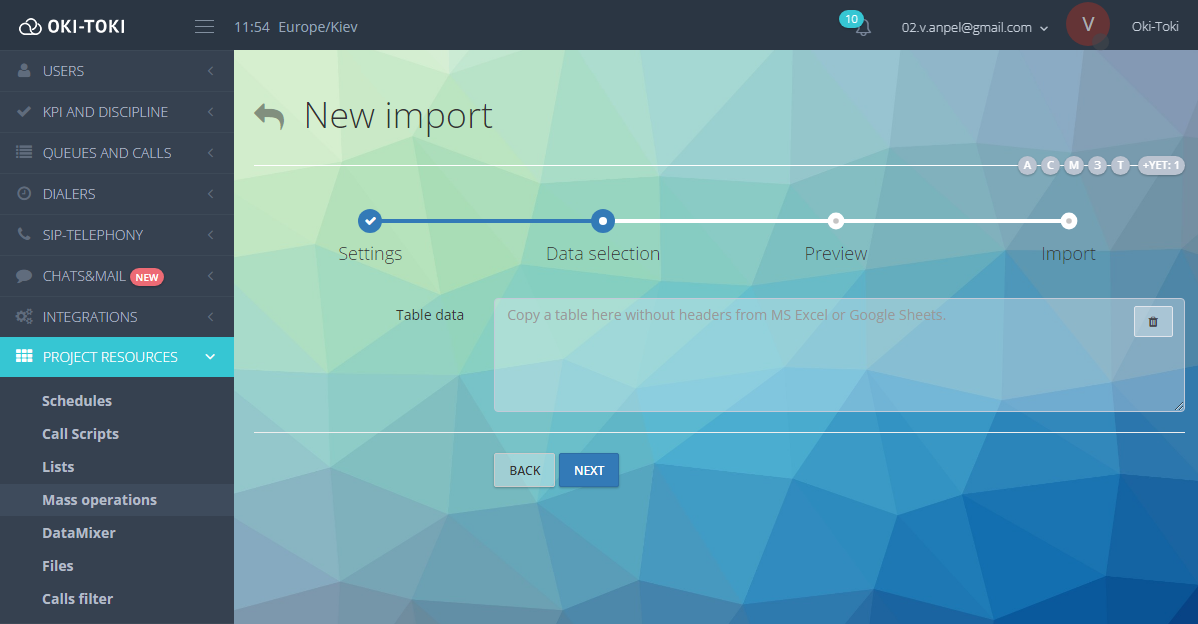
Now let’s move on to the second item — automating the import of contacts into CRM. A table will open in front of you, into which you need to paste data from MS Excel or Google Sheets. If you are importing data only into the dialer, you can upload it along with the table headers to use them as contact fields in the CRM form. These fields are needed to fill in client information: name, address, and other details.
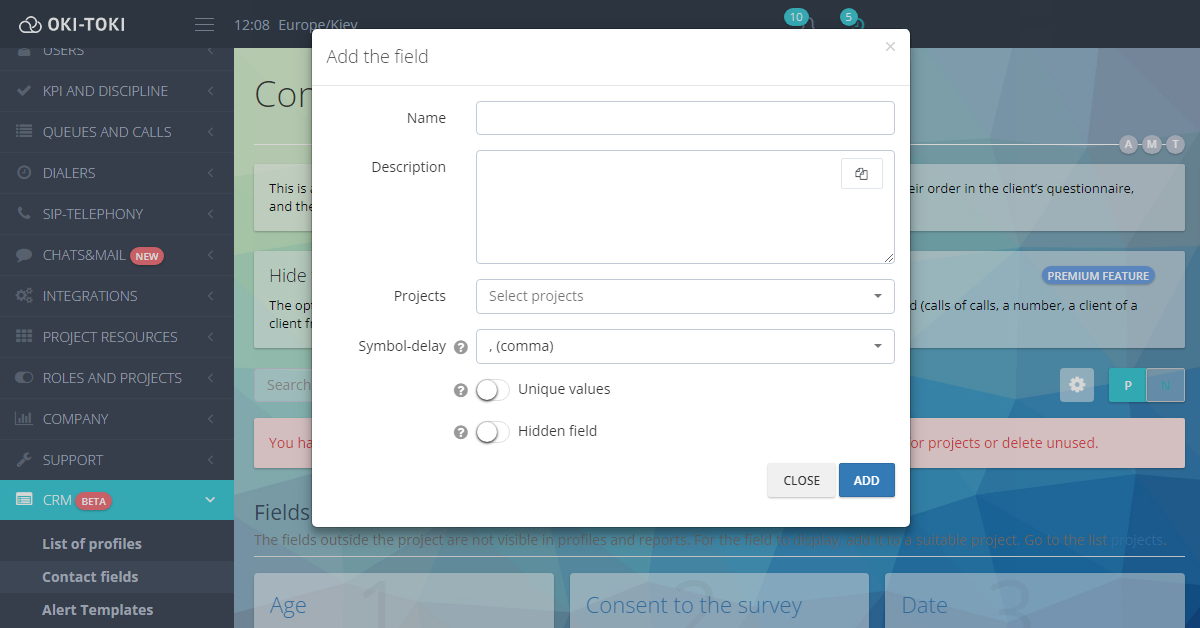
When importing into CRM, make sure that a corresponding contact field is created for each column, which will store the imported information. To set up contact fields in CRM, go to the CRM section, then to Contact fields. Click Create, set a name for the field, and click Add. Now this field will be available for import, and you can place data in it.
After the data is added to the import table, proceed to the next item.
Step 3: Preview
Import to dialer
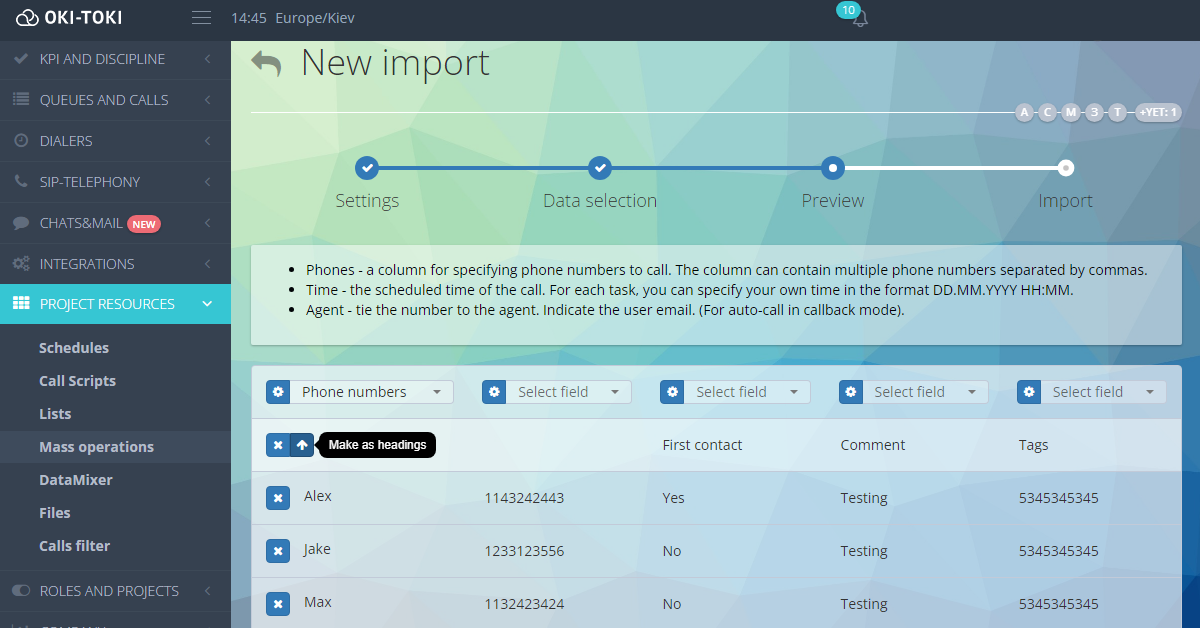
In this section, you can view and check all the data you plan to import. You can also move the headers by clicking on the up arrow. Make sure that the system field Phones is selected in the column with phone numbers.
Import to CRM
As the necessary fields for contacts were previously created, you need to map them to each column of the table.
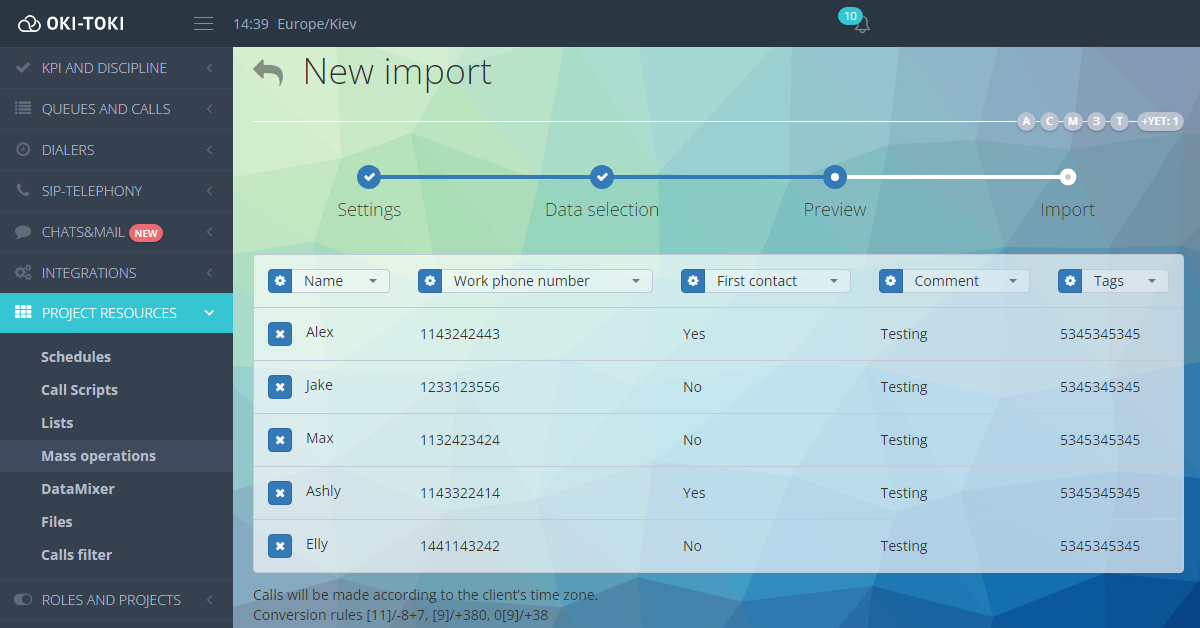
After editing the data in the Preview section, click Import.
Import results
If everything is done correctly, the import process will end successfully, and the numbers will be uploaded. However, there can be cases when some contacts are marked as failed. This can happen due to duplicates check during contacts import or if these numbers are in the blacklist. You can specify the Blacklist in the dialer settings, and during import, the system will check against the list and won’t add the numbers.
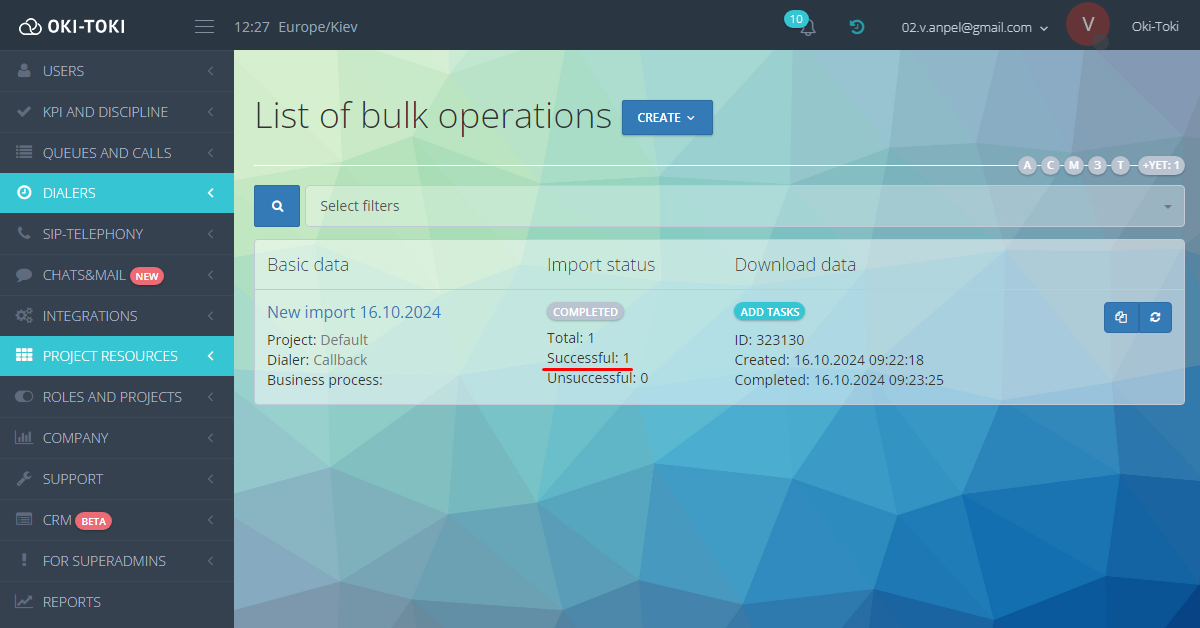
What to do if there are contacts in the “Failure” row in the import results table?
Simply click on the “Failure” status (highlighted as a hyperlink) to download the list of failed contacts. For more information, click the Actions button to the right of the table — Result.
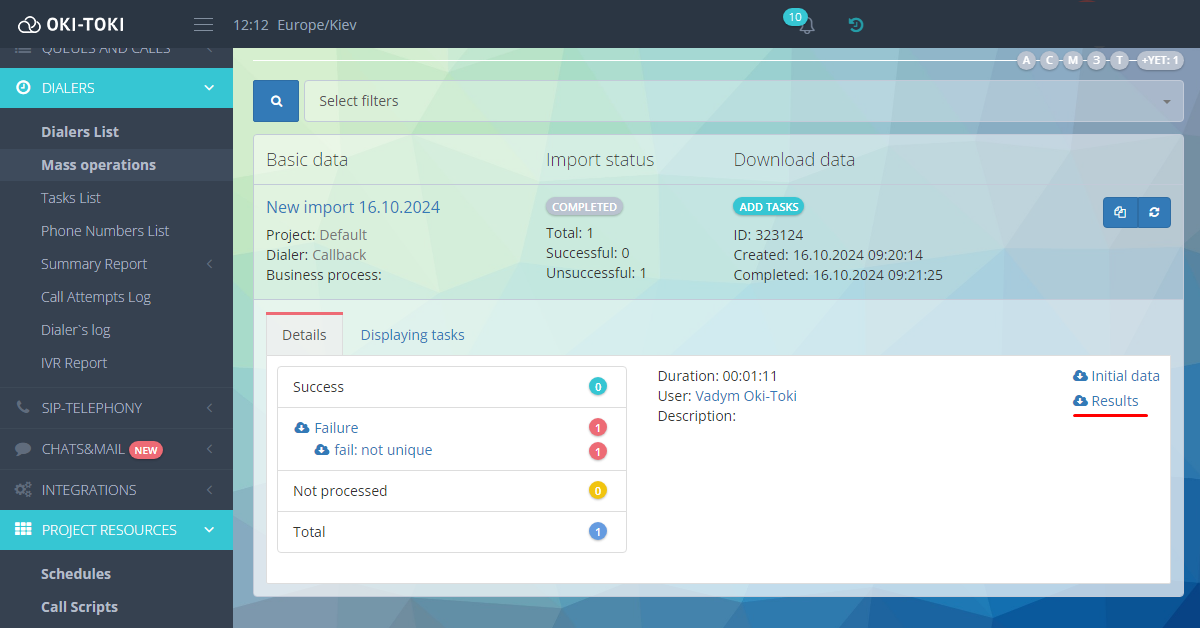
In the first column, you can see one of the following explanations for the failed upload:
- not_unique — not unique: the number already exists in the dialer or as a contact (if duplicates check is active).
- wrong_format — incorrect format: the status may occur if an incorrect value is specified in the phone number field.
- blacklisted — numbers are on the blacklist.
Properly configured contact import helps avoid problems with incorrect numbers and other errors that can hinder the contact center’s operation. By following these instructions, you will easily overcome the challenge, and the import will become faster and more reliable, helping you better manage and optimize the call center’s work.


