The “Projects” tool relates to an enhanced type of security and is perfect for outsourcing companies, where business processes are independent from each other and must be hidden from prying or unauthorized eyes. This Oki-Toki feature restricts certain users by hiding cases, calls, report data, and sections they should not see. Such security settings are especially useful for call center outsourcing projects, where protecting clients’ confidential information and avoiding data breaches is a top priority.
Task division in the contact center is suitable for companies where agents work on different call center projects or are divided into groups, each dealing with a specific company. For example, you can manage separate call center queue management processes for different departments, ensuring smooth and organized workflows.
How to set up agent groups read a separate article on the blog.
Collection agencies, outsourcing, real estate, logistics, delivery, medical centers, fitness clubs, online stores, survey companies — all can use the Oki-Toki service to set up projects and manage calls. Companies from different sectors will be able to create their independent cases, maintaining transparency and control and making the call center work more organized.
Enhanced security
To set up projects, switch from the simplified security version to the enhanced one. You can do this in the “Company” menu by selecting the section “Settings” and changing the type of security. As a result, your first project “Default” will be automatically created.
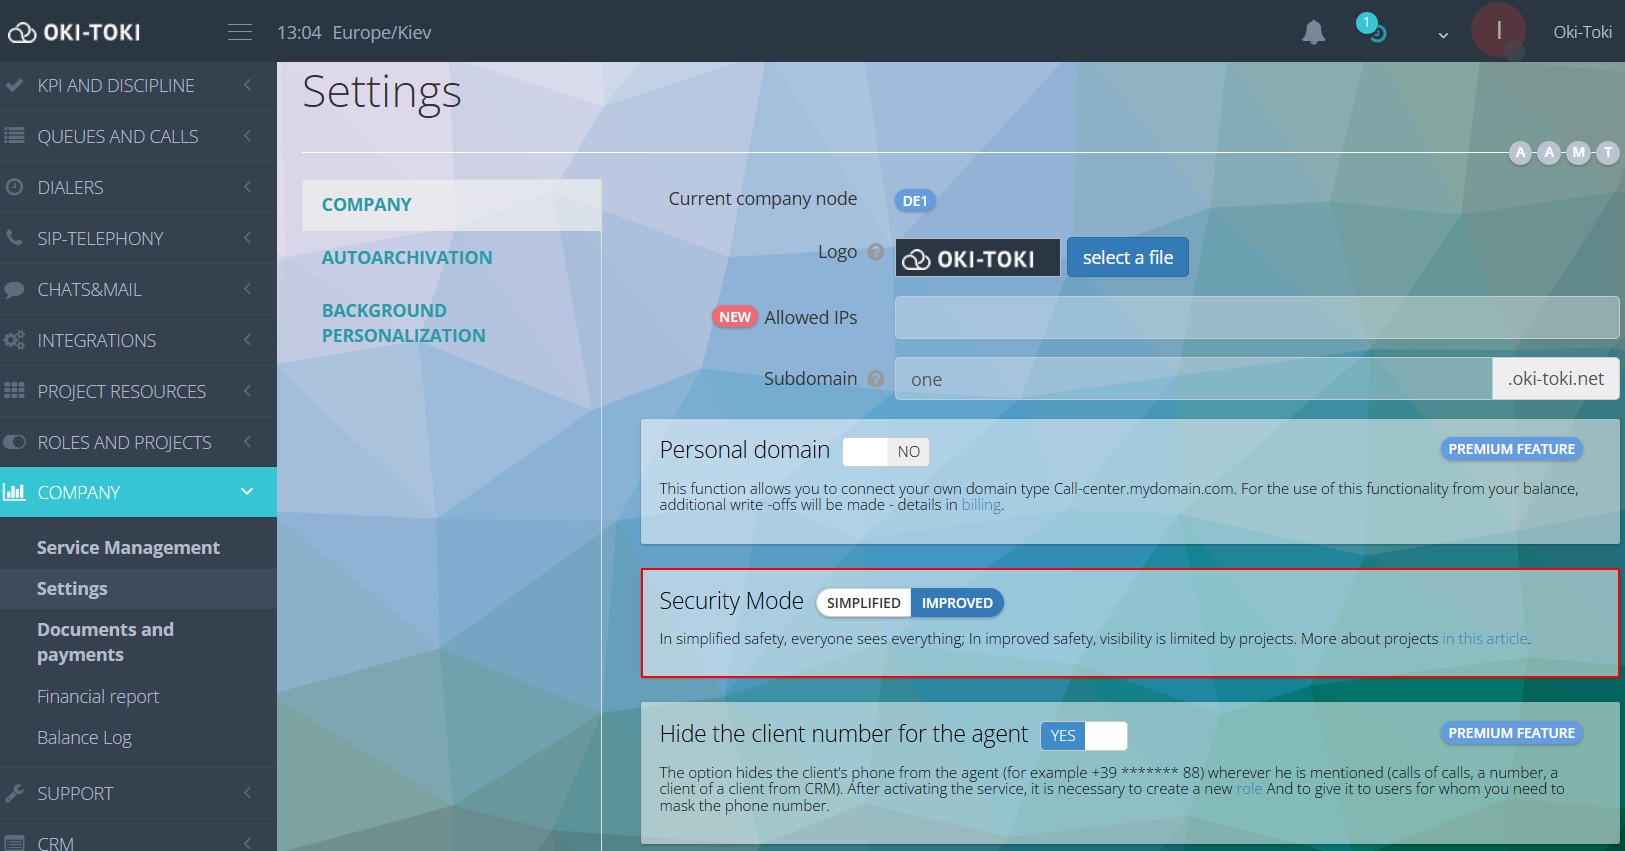
Important! When changing the security type to Enhanced, a “Default” project is automatically created, in which all company objects and existing users will be located. If you create a new project for an employee already added to oki-toki, he needs to be excluded from “Default”.
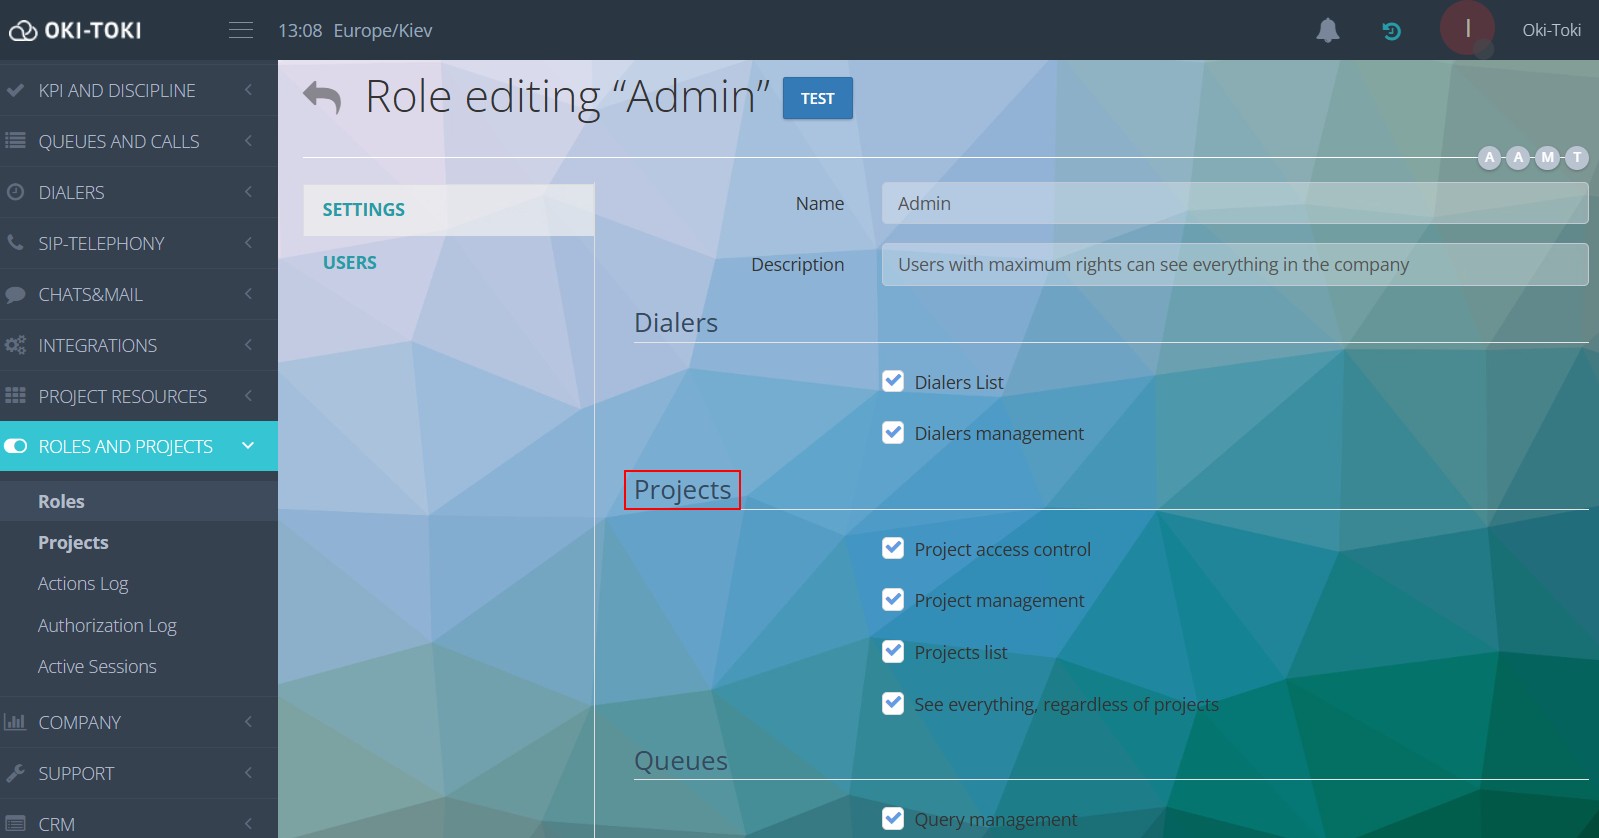
Managing projects in the call center is by default available only to a user with a role of Admin. This is a template role, in which the staff sees everything, regardless of the projects. You can create your roles and allow (or restrict) access to management and viewing of projects. List of accesses for working with projects:
- See everything, regardless of the projects – view all projects without restrictions.
- Project list – only tiles will be visible, without the objects that belong to them.
- Access management – adding and removing users from projects.
- Project management – creating new projects, editing, adding and deleting objects.
Creating projects in the call center
- To create a project, go to the “Projects” section and click “Create”;
- Specify the name and you can add a description.
The foundation for settings is ready. In the list, find the created project and specify objects that should be in it. The project needs to add users or groups — i.e., those employees who will work on this project. Then select the elements for your business process, meaning put together your project and everything related to it.
How to divide call center projects in Oki-Toki
For the project to function – you need to add employees and objects through the “Edit” button on the right:
- Users – these are your agents. Agents can be in one project or in several. You can use search or sort by groups. When hovering over with the cursor, the projects in which these users work are displayed;
- Queues – a tool for setting up incoming and outgoing calls;
- Schedule – work schedule, which can be applied to an agent (WFM), dialer or queue;
- SIP providers – these are your communication providers, through whom calls go.
- Call scripts – the logic of call progression for an inbound line or dialer (e.g., IVR, voice notification, etc.)
- Dialers – functionality for automatic dialing of a number base;
- Lists – used for call scripts, unwanted or VIP numbers, as well as for scripts;
- Notification Templates – for sending emails and SMS messages;
- CRM Forms – agent script for conversation with a client;
- IP Phones – VoIP phones, softphones, through which agents work.
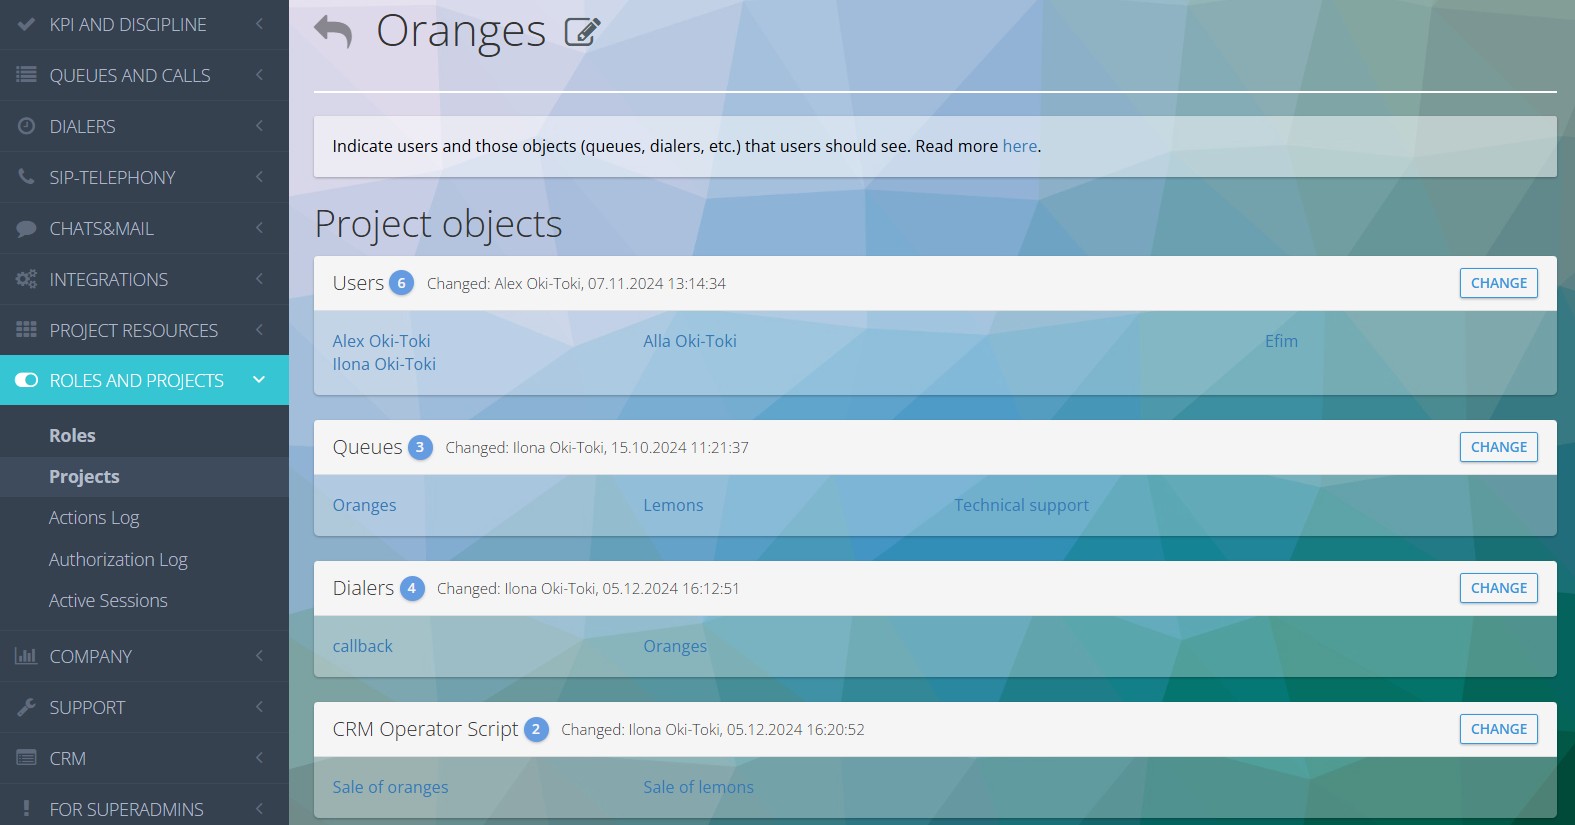
- For the changes to take effect, the user assigned to the projects just needs to refresh the page and he will see the objects that have been added to his project;
Reporting in Oki-Toki
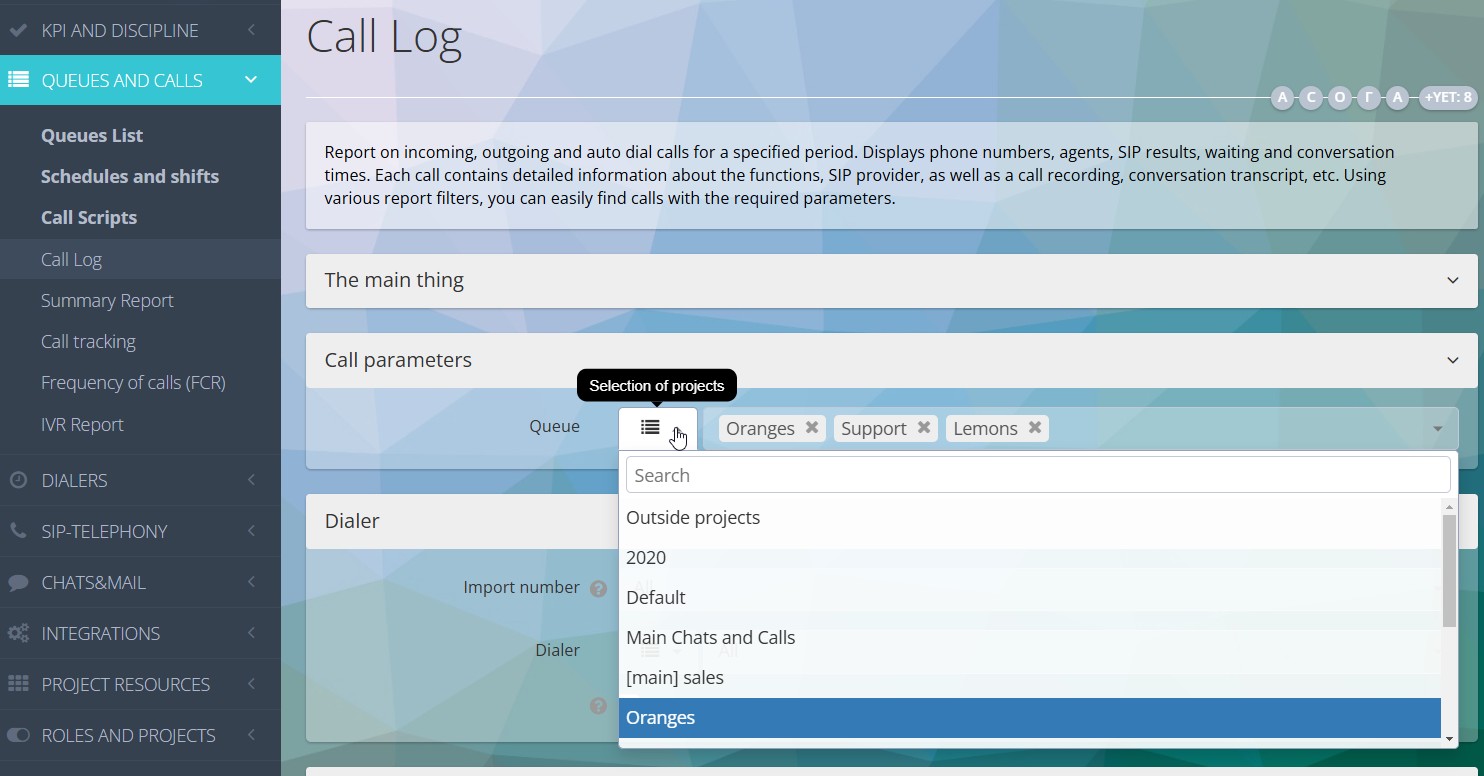
In Oki-Toki, there are more than 30 useful reports, and many of them (where needed) have a project selection. For example, in the Call Log, you can select a specific project, instead of manually specifying all dialers and queues on one project. It’s quick and convenient.
Additionally
- You can add an object to the project both in settings and during creation. For example, when adding a new employee to the company, you can immediately specify which project he will work on.
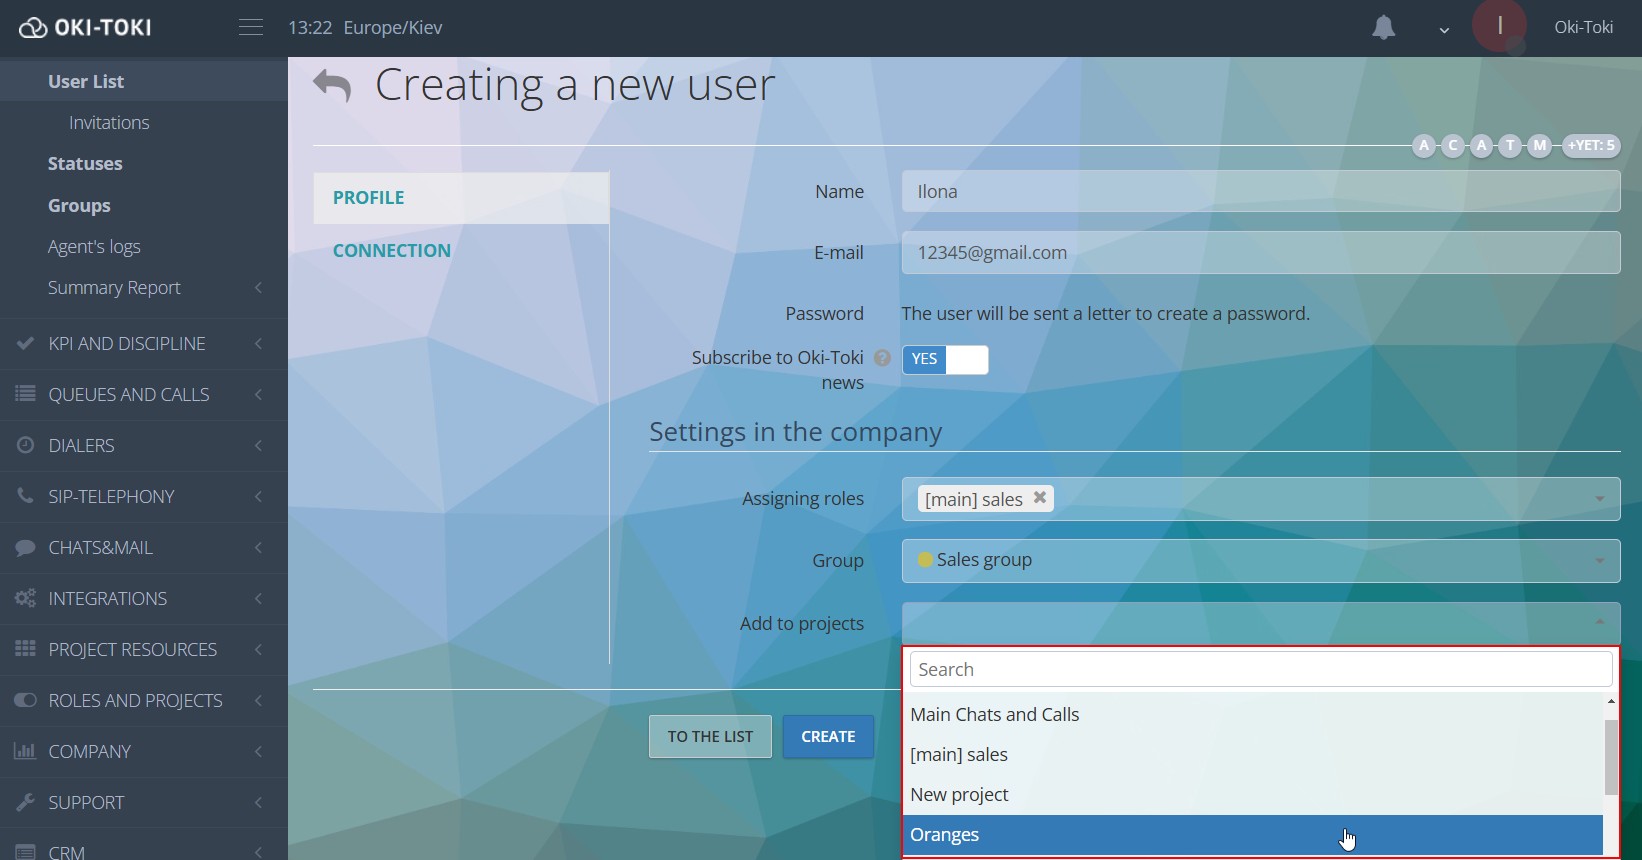
The same logic is applied when creating call scripts, queues, and also when importing numbers into a dialer or CRM.
- Queues, Call scripts, Dialers, and CRM Forms can only be in one project. How to create a Hotline from scratch read in the article on the blog.
- All changes made in the project are logged, and you can see which users made edits and what exactly changes were made.
Setting up projects in a call center is not an easy task, but with Oki-Toki, setting this up is easier. Thanks to a unified interface, everything can be set up in one place, without switching between accounts or creating several personal cabinets. Administrators can easily manage projects, add users, change objects, and receive reports on specific cases.
In addition, Oki-Toki provides a high level of data security — access to projects is restricted, and only users with “rights” can see objects and make changes. Such a system excludes access of unauthorized persons to important information. Thus, your call center operates with different business processes, which are protected from prying eyes.

